# 10.6 自绘组件:CustomCheckbox
Flutter 自带的 Checkbox 组件是不能自由指定大小的,本节我们通过自定义一个可以自由指定大小的 CustomCheckbox 组件来演示如何通过定义 RenderObject 的方式来自定义组件(而不是通过组合)。
- 有选中和未选中两种状态。
- 状态切换时要执行动画。
- 可以自定义外观。
CustomCheckbox 定义如下:
class CustomCheckbox extends LeafRenderObjectWidget {
CustomCheckbox({
Key? key,
this.strokeWidth = 2.0,
this.value = false,
this.strokeColor = Colors.white,
this.fillColor = Colors.blue,
this.radius = 2.0,
this.onChanged,
}) : super(key: key);
final double strokeWidth; // “勾”的线条宽度
final Color strokeColor; // “勾”的线条宽度
final Color? fillColor; // 背景填充颜色
final bool value; //选中状态
final double radius; // 圆角
final ValueChanged<bool>? onChanged; // 选中状态发生改变后的回调
RenderObject createRenderObject(BuildContext context) {
return RenderCustomCheckbox(
strokeWidth,
strokeColor,
fillColor ?? Theme.of(context).primaryColor, // 填充颜色如果未指定则使用主题色
value,
radius,
onChanged,
);
}
void updateRenderObject(context, RenderCustomCheckbox renderObject) {
if (renderObject.value != value) {
//选中状态发生了变化,则需要调整动画状态以执行过渡动画
renderObject.animationStatus =
value ? AnimationStatus.forward : AnimationStatus.reverse;
}
renderObject
..strokeWidth = strokeWidth
..strokeColor = strokeColor
..fillColor = fillColor ?? Theme.of(context).primaryColor
..radius = radius
..value = value
..onChanged = onChanged;
}
}
2
3
4
5
6
7
8
9
10
11
12
13
14
15
16
17
18
19
20
21
22
23
24
25
26
27
28
29
30
31
32
33
34
35
36
37
38
39
40
41
42
43
44
45
46
上面代码中唯一需要注意的就是 updateRenderObject 方法中当选中状态发生变化时,我们要更新RenderObject中的动画状态,具体逻辑是:当从未选中切换为选中状态时,执行正向动画;当从选中状态切换为未选中状态时执行反向动画。
接下来需要实现 RenderCustomCheckbox:
class RenderCustomCheckbox extends RenderBox {
bool value;
int pointerId = -1;
double strokeWidth;
Color strokeColor;
Color fillColor;
double radius;
ValueChanged<bool>? onChanged;
// 下面的属性用于调度动画
double progress = 0; // 动画当前进度
int? _lastTimeStamp;//上一次绘制的时间
//动画执行时长
Duration get duration => const Duration(milliseconds: 150);
//动画当前状态
AnimationStatus _animationStatus = AnimationStatus.completed;
set animationStatus(AnimationStatus v) {
if (_animationStatus != v) {
markNeedsPaint();
}
_animationStatus = v;
}
//背景动画时长占比(背景动画要在前40%的时间内执行完毕,之后执行打勾动画)
final double bgAnimationInterval = .4;
RenderCustomCheckbox(this.strokeWidth, this.strokeColor, this.fillColor,
this.value, this.radius, this.onChanged)
: progress = value ? 1 : 0;
void performLayout() {} //布局
void paint(PaintingContext context, Offset offset) {
Rect rect = offset & size;
// 将绘制分为背景(矩形)和 前景(打勾)两部分,先画背景,再绘制'勾'
_drawBackground(context, rect);
_drawCheckMark(context, rect);
// 调度动画
_scheduleAnimation();
}
// 画背景
void _drawBackground(PaintingContext context, Rect rect) {}
//画 "勾"
void _drawCheckMark(PaintingContext context, Rect rect) { }
//调度动画
void _scheduleAnimation() {}
... //响应点击事件
}
2
3
4
5
6
7
8
9
10
11
12
13
14
15
16
17
18
19
20
21
22
23
24
25
26
27
28
29
30
31
32
33
34
35
36
37
38
39
40
41
42
43
44
45
46
47
48
49
50
51
52
53
# 实现布局算法
为了使用户可以自定义宽高,我们的布局策略是:如果父组件指定了固定宽高,则使用父组件指定的,否则宽高默认置为 25:
void performLayout() {
size = constraints.constrain(
constraints.isTight ? Size.infinite : Size(25, 25),
);
}
2
3
4
5
6
# 绘制 CustomCheckbox
记下来重点就是绘制 CustomCheckbox 了,为了清洗起见,我们将绘制分为背景(矩形)和 前景(打勾)两部分,先画背景,再绘制'勾',这里需要注意两点:
- 我们绘制的是动画执行过程中的一帧,所以需要通过动画执行的进度(progress)来计算每一帧要绘制的样子。
- 当 CustomCheckbox 从未选中变为选中时,我们执行正向动画,progress 的值会从 0 逐渐变为 1,因为 CustomCheckbox 的背景和前景('勾')的颜色要有对比,所以我们在背景绘制完之后再绘制前景。因此,我们将动画分割为两端,前 40% 的时间画背景,后 60%的时间画'勾'。
# 绘制背景
下面我们先看看如何绘制背景:
- 当状态切换为选中状态时,将矩形逐渐从边缘向中心收缩填充,直到填满 Checkbox 区域。
- 当状态切换为未选中状态时,填充从中间逐渐向边缘消散,直到只剩一个边框为止。

实现的思路是先将整个背景矩形区域全部填充满蓝色,然后在上面绘制一个白色背景的矩形,根据动画进度来动态改变白色矩形区域大小即可。幸运的是 Canvas API 中已经帮助我们实现了我们期望的功能,drawDRRect 他可以指定内外两个矩形,然后画出不相交的部分,并且可以指定圆角,下面是具体实现:
void _drawBackground(PaintingContext context, Rect rect) {
  Color color = value ? fillColor : Colors.grey;
  var paint = Paint()
    ..isAntiAlias = true
    ..style = PaintingStyle.fill //填充
    ..strokeWidth
    ..color = color;

  // 我们需要算出每一帧里面矩形的大小,为此我们可以直接根据矩形插值方法来确定里面矩形
  final outer = RRect.fromRectXY(rect, radius, radius);
  var rects = [
    rect.inflate(-strokeWidth),
    Rect.fromCenter(center: rect.center, width: 0, height: 0)
  ];
  // 根据动画执行进度调整来确定里面矩形在每一帧的大小
  var rectProgress = Rect.lerp(
    rects[0],
    rects[1],
    // 背景动画的执行时长是前 40% 的时间
    min(progress, bgAnimationInterval) / bgAnimationInterval,
  )!;
  final inner = RRect.fromRectXY(rectProgress, 0, 0);
  // 绘制
  context.canvas.drawDRRect(outer, inner, paint);
}
2
3
4
5
6
7
8
9
10
11
12
13
14
15
16
17
18
19
20
21
22
23
24
25
# 绘制前景
前景是一个"勾",它有三个点的连线构成,为了简单起见,我们将起始点和中点拐点的位置根据 Checkbox 的大小算出固定的坐标,然后我们在每一帧中动态调整第三个点的位置就可以实现打勾动画:
//画 "勾"
void _drawCheckMark(PaintingContext context, Rect rect) {
  // 在画好背景后再画前景
  if (progress > bgAnimationInterval) {

    //确定中间拐点位置
    final secondOffset = Offset(
      rect.left + rect.width / 2.5,
      rect.bottom - rect.height / 4,
    );
    // 第三个点的位置
    final lastOffset = Offset(
      rect.right - rect.width / 6,
      rect.top + rect.height / 4,
    );

    // 我们只对第三个点的位置做插值
    final _lastOffset = Offset.lerp(
      secondOffset,
      lastOffset,
      (progress - bgAnimationInterval) / (1 - bgAnimationInterval),
    )!;

    // 将三个点连起来
    final path = Path()
      ..moveTo(rect.left + rect.width / 7, rect.top + rect.height / 2)
      ..lineTo(secondOffset.dx, secondOffset.dy)
      ..lineTo(_lastOffset.dx, _lastOffset.dy);

    final paint = Paint()
      ..isAntiAlias = true
      ..style = PaintingStyle.stroke
      ..color = strokeColor
      ..strokeWidth = strokeWidth;

    context.canvas.drawPath(path, paint..style = PaintingStyle.stroke);
  }
}
2
3
4
5
6
7
8
9
10
11
12
13
14
15
16
17
18
19
20
21
22
23
24
25
26
27
28
29
30
31
32
33
34
35
36
37
38
# 调度动画
最后,我们需要让UI动起来,这时我们回想一下前面动画一章中的内容,会意识到 Flutter 的动画框架是依赖于 StatefulWidget 的,即当状态改变时显式或隐式的去调用 setState 触发更新。但是我们直接通过定义 RenderObject 的方式来实现的 CustomCheckbox,并不是基于 StatefulWidget ,那该怎么来调度动画呢?有两种办法:
- 将 CustomCheckbox 用一个 StatefulWidget 包装起来,这样就可以复用之前介绍的执行动画的方法。
- 自定义动画调度。
第一种方法相信读者已经很熟悉了,不再赘述,下面我们演示一下第二种方法,我们的思路是:在一帧绘制结束后判断动画是否结束,如果动画未结束,则将将当前组件标记为”需要重绘“,然后等待下一帧即可:
void _scheduleAnimation() {
  if (_animationStatus != AnimationStatus.completed) {
    // 需要在Flutter 当前frame 结束之前再执行,因为不能在绘制过程中又将组件标记为需要重绘
    SchedulerBinding.instance!.addPostFrameCallback((Duration timeStamp) {
      if (_lastTimeStamp != null) {
        double delta = (timeStamp.inMilliseconds - _lastTimeStamp!) /
          duration.inMilliseconds;
        // 如果是反向动画,则 progress值要逐渐减小
        if (_animationStatus == AnimationStatus.reverse) {
          delta = -delta;
        }
        //更新动画进度
        progress = progress + delta;

        if (progress >= 1 || progress <= 0) {
          //动画执行结束
          _animationStatus = AnimationStatus.completed;
          progress = progress.clamp(0, 1);
        }
      }
       //标记为需要重绘
      markNeedsPaint();
      _lastTimeStamp = timeStamp.inMilliseconds;
    });
  } else {
    _lastTimeStamp = null;
  }
}
2
3
4
5
6
7
8
9
10
11
12
13
14
15
16
17
18
19
20
21
22
23
24
25
26
27
28
# 响应点击事件
根据之前事件处理相关章节的介绍,如果我们要让渲染对象能处理事件,则它必须能通过命中测试,之后才能在 handleEvent 方法中处理事件,所以我们需要添加如下代码:
// 必须置为true,确保能通过命中测试
bool hitTestSelf(Offset position) => true;
// 只有通过命中测试,才会调用本方法,我们在手指抬起时触发事件即可
void handleEvent(PointerEvent event, covariant BoxHitTestEntry entry) {
if (event.down) {
pointerId = event.pointer;
} else if (pointerId == event.pointer) {
// 手指抬起时触发回调
onChanged?.call(!value);
}
}
2
3
4
5
6
7
8
9
10
11
12
13
# 动画调度抽象 RenderObjectAnimationMixin
我们可以看到,在RenderObject 中调度动画还是比较复杂的,为此我们抽象了一个 RenderObjectAnimationMixin,如果还有其它 RenderObject 中需要执行动画,可以直接复用。
mixin RenderObjectAnimationMixin on RenderObject {
double _progress = 0;
int? _lastTimeStamp;
// 动画时长,子类可以重写
Duration get duration => const Duration(milliseconds: 200);
AnimationStatus _animationStatus = AnimationStatus.completed;
// 设置动画状态
set animationStatus(AnimationStatus v) {
if (_animationStatus != v) {
markNeedsPaint();
}
_animationStatus = v;
}
double get progress => _progress;
set progress(double v) {
_progress = v.clamp(0, 1);
}
void paint(PaintingContext context, Offset offset) {
doPaint(context, offset); // 调用子类绘制逻辑
_scheduleAnimation();
}
void _scheduleAnimation() {
if (_animationStatus != AnimationStatus.completed) {
SchedulerBinding.instance!.addPostFrameCallback((Duration timeStamp) {
if (_lastTimeStamp != null) {
double delta = (timeStamp.inMilliseconds - _lastTimeStamp!) /
duration.inMilliseconds;
//在特定情况下,可能在一帧中连续的往frameCallback中添加了多次,导致两次回调时间间隔为0,
//这种情况下应该继续请求重绘。
if (delta == 0) {
markNeedsPaint();
return;
}
if (_animationStatus == AnimationStatus.reverse) {
delta = -delta;
}
_progress = _progress + delta;
if (_progress >= 1 || _progress <= 0) {
_animationStatus = AnimationStatus.completed;
_progress = _progress.clamp(0, 1);
}
}
markNeedsPaint();
_lastTimeStamp = timeStamp.inMilliseconds;
});
} else {
_lastTimeStamp = null;
}
}
// 子类实现绘制逻辑的地方
void doPaint(PaintingContext context, Offset offset);
}
2
3
4
5
6
7
8
9
10
11
12
13
14
15
16
17
18
19
20
21
22
23
24
25
26
27
28
29
30
31
32
33
34
35
36
37
38
39
40
41
42
43
44
45
46
47
48
49
50
51
52
53
54
55
56
57
58
59
60
61
62
# CustomCheckbox 的完整源码
则最终 CustomCheckbox 的完整源码为
class CustomCheckbox extends LeafRenderObjectWidget {
CustomCheckbox({
Key? key,
this.strokeWidth = 2.0,
this.value = false,
this.strokeColor = Colors.white,
this.fillColor = Colors.blue,
this.radius = 2.0,
this.onChanged,
}) : super(key: key);
final double strokeWidth; // “勾”的线条宽度
final Color strokeColor; // “勾”的线条宽度
final Color? fillColor; // 填充颜色
final bool value; //选中状态
final double radius; // 圆角
final ValueChanged<bool>? onChanged; // 选中状态发生改变后的回调
RenderObject createRenderObject(BuildContext context) {
return RenderCustomCheckbox(
strokeWidth,
strokeColor,
fillColor ?? Theme.of(context).primaryColor,
value,
radius,
onChanged,
);
}
void updateRenderObject(context, RenderCustomCheckbox renderObject) {
if (renderObject.value != value) {
renderObject.animationStatus =
value ? AnimationStatus.forward : AnimationStatus.reverse;
}
renderObject
..strokeWidth = strokeWidth
..strokeColor = strokeColor
..fillColor = fillColor ?? Theme.of(context).primaryColor
..radius = radius
..value = value
..onChanged = onChanged;
}
}
// 动画调度相关逻辑直接 with RenderObjectAnimationMixin即可
class RenderCustomCheckbox extends RenderBox with RenderObjectAnimationMixin {
bool value;
int pointerId = -1;
double strokeWidth;
Color strokeColor;
Color fillColor;
double radius;
ValueChanged<bool>? onChanged;
RenderCustomCheckbox2(this.strokeWidth, this.strokeColor, this.fillColor,
this.value, this.radius, this.onChanged) {
progress = value ? 1 : 0;
}
bool get isRepaintBoundary => true;
//背景动画时长占比(背景动画要在前40%的时间内执行完毕,之后执行打勾动画)
final double bgAnimationInterval = .4;
void doPaint(PaintingContext context, Offset offset) {
Rect rect = offset & size;
_drawBackground(context, rect);
_drawCheckMark(context, rect);
}
void _drawBackground(PaintingContext context, Rect rect) {
Color color = value ? fillColor : Colors.grey;
var paint = Paint()
..isAntiAlias = true
..style = PaintingStyle.fill //填充
..strokeWidth
..color = color;
// 我们对矩形做插值
final outer = RRect.fromRectXY(rect, radius, radius);
var rects = [
rect.inflate(-strokeWidth),
Rect.fromCenter(center: rect.center, width: 0, height: 0)
];
var rectProgress = Rect.lerp(
rects[0],
rects[1],
min(progress, bgAnimationInterval) / bgAnimationInterval,
)!;
final inner = RRect.fromRectXY(rectProgress, 0, 0);
// 画背景
context.canvas.drawDRRect(outer, inner, paint);
}
//画 "勾"
void _drawCheckMark(PaintingContext context, Rect rect) {
// 在画好背景后再画前景
if (progress > bgAnimationInterval) {
//确定中间拐点位置
final secondOffset = Offset(
rect.left + rect.width / 2.5,
rect.bottom - rect.height / 4,
);
// 第三个点的位置
final lastOffset = Offset(
rect.right - rect.width / 6,
rect.top + rect.height / 4,
);
// 我们只对第三个点的位置做插值
final _lastOffset = Offset.lerp(
secondOffset,
lastOffset,
(progress - bgAnimationInterval) / (1 - bgAnimationInterval),
)!;
// 将三个点连起来
final path = Path()
..moveTo(rect.left + rect.width / 7, rect.top + rect.height / 2)
..lineTo(secondOffset.dx, secondOffset.dy)
..lineTo(_lastOffset.dx, _lastOffset.dy);
final paint = Paint()
..isAntiAlias = true
..style = PaintingStyle.stroke
..color = strokeColor
..strokeWidth = strokeWidth;
context.canvas.drawPath(path, paint..style = PaintingStyle.stroke);
}
}
void performLayout() {
// 如果父组件指定了固定宽高,则使用父组件指定的,否则宽高默认置为 25
size = constraints.constrain(
constraints.isTight ? Size.infinite : Size(25, 25),
);
}
// 必须置为true,否则不可以响应事件
bool hitTestSelf(Offset position) => true;
// 只有通过点击测试的组件才会调用本方法
void handleEvent(PointerEvent event, covariant BoxHitTestEntry entry) {
if (event.down) {
pointerId = event.pointer;
} else if (pointerId == event.pointer) {
// 判断手指抬起时是在组件范围内的话才触发onChange
if(size.contains(event.localPosition)) {
onChanged?.call(!value);
}
}
}
}
2
3
4
5
6
7
8
9
10
11
12
13
14
15
16
17
18
19
20
21
22
23
24
25
26
27
28
29
30
31
32
33
34
35
36
37
38
39
40
41
42
43
44
45
46
47
48
49
50
51
52
53
54
55
56
57
58
59
60
61
62
63
64
65
66
67
68
69
70
71
72
73
74
75
76
77
78
79
80
81
82
83
84
85
86
87
88
89
90
91
92
93
94
95
96
97
98
99
100
101
102
103
104
105
106
107
108
109
110
111
112
113
114
115
116
117
118
119
120
121
122
123
124
125
126
127
128
129
130
131
132
133
134
135
136
137
138
139
140
141
142
143
144
145
146
147
148
149
150
151
152
153
154
155
156
157
158
159
160
161
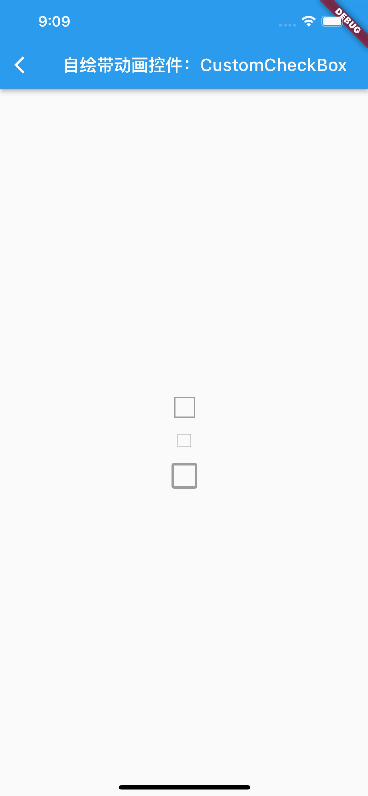
测试代码如下:我们创建三个大小不同的复选框,点击其中任意一个,另外两个复选框的状态也会跟着联动:
class CustomCheckboxTest extends StatefulWidget {
const CustomCheckboxTest({Key? key}) : super(key: key);
State<CustomCheckboxTest> createState() => _CustomCheckboxTestState();
}
class _CustomCheckboxTestState extends State<CustomCheckboxTest> {
bool _checked = false;
Widget build(BuildContext context) {
return Center(
child: Column(mainAxisAlignment: MainAxisAlignment.center,
children: [
CustomCheckbox2(
value: _checked,
onChanged: _onChange,
),
Padding(
padding: const EdgeInsets.all(18.0),
child: SizedBox(
width: 16,
height: 16,
child: CustomCheckbox(
strokeWidth: 1,
radius: 1,
value: _checked,
onChanged: _onChange,
),
),
),
SizedBox(
width: 30,
height: 30,
child: CustomCheckbox(
strokeWidth: 3,
radius: 3,
value: _checked,
onChanged: _onChange,
),
),
],
),
);
}
void _onChange(value) {
setState(() => _checked = value);
}
}
2
3
4
5
6
7
8
9
10
11
12
13
14
15
16
17
18
19
20
21
22
23
24
25
26
27
28
29
30
31
32
33
34
35
36
37
38
39
40
41
42
43
44
45
46
47
48
49
50
51
# 总结
本节演示了如何通过自定义 RenderObject 的方式来进行UI绘制、动画调度和事件处理。